How to create an "Added to Cart" event for Shopify in Klaviyo
How to create an "Added to Cart" event for Shopify in Klaviyo
This is different from the Checkout Started event from Klaviyo’s built-in Shopify integration, which only triggers after a customer adds item(s) to their cart, enters their email during the checkout process, and continues to checkout. This happens further down the funnel, whereas the custom Added to Cart event triggers as soon as a customer adds an item to their cart.
##
Before you begin
Read our article [Getting started with Shopify](https://help.klaviyo.com/hc/en-us/articles/115005080407-How-to-Integrate-with-Shopify) for step-by-step instructions on integrating before continuing with this article
Make sure you already have [Klaviyo onsite tracking enabled](https://help.klaviyo.com/hc/en-us/articles/4425956184731) (including Viewed Product tracking) in order for the Added to Cart event to function properly
Please note that the Added to Cart event only tracks users [previously cookied by Klaviyo](https://help.klaviyo.com/hc/en-us/articles/115005076767-Guide-to-Klaviyo-Onsite-Tracking#who-klaviyo-tracks5)
Based on your Customer Privacy settings in Shopify, Klaviyo may not track onsite events (including Active on Site, Viewed Product, and Added to Cart) for visitors to your Shopify store in the EU, EEA, UK and Switzerland, unless they have provided consent.
##
Create the “Added to Cart” event
There are 3 steps to creating the Added to Cart event:
1. Choose where to place the code snippet
2. Add the snippet to your store
3. Test the code snippet
##
Where should I paste the snippet?
Make sure to paste the snippet in both your default product page, and in any other product pages you may have.
###
If your store has custom liquid blocks, you should use one for the snippet
1. In Shopify, navigate to Online Store > Themes.
2. Find your theme and click Customize.
3. At the top of the page, click the Home page dropdown.
4. Select Products > Default product to be brought to your default product page.
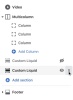
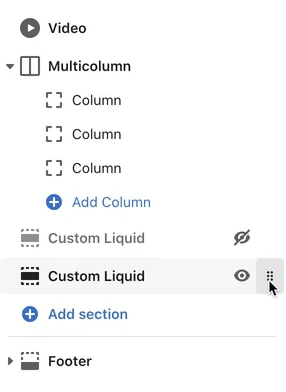
5. Click Add section in the left sidebar and then select Custom Liquid.
6. Paste the provided snippet in the box.
7. Click Save in the upper right.
8. In the left sidebar, your new Custom Liquid block for Added to Cart should automatically appear below the other sections on the page.
If your Added to Cart block needs to be moved, hover over the block and click the 6 dots to drag it below your other sections\
0:09
###
If your store does not have custom liquid blocks, you should place the snippet in your theme.liquid file
1. In Shopify, navigate to Online Store > Themes.
2. Find your theme and click Customize.
3. Click the three dots at the top and select Edit code.
4. Open the theme.liquid file.
5. Paste the provided snippet after all other code, before the closing `` tag.\

7. Directly after the snippet, add the following closing tag: `{% endif %}`
8. Your file should look like this:\

9. Click Save.
##
Add the snippet to your site
The following Added to Cart snippet should work for most Shopify stores.
Every Shopify store is different. If you try the snippet below, test it, and it doesn't work, you can always try a backup snippet provided under the "Having trouble?" dropdown below.
Add the snippet below to your Shopify store in the location you determined above.
```javascript
</h1></h2></h3><br>window.addEventListener('load', function() {</h1></h2></h3><br>var <i>learnq = window.<i>learnq || [];</h1></h2></h3><br>function addedToCart() {</h1></h2></h3><br> fetch(`${window.location.origin}/cart.js`)</h1></h2></h3><br> .then(res => res.clone().json().then(data => {</h1></h2></h3><br> var cart = {</h1></h2></h3><br> total<i>price: data.total<i>price/100,</h1></h2></h3><br> $value: data.total<i>price/100,</h1></h2></h3><br> total<i>discount: data.total<i>discount,</h1></h2></h3><br> original<i>total<i>price: data.original<i>total<i>price/100,</h1></h2></h3><br> items: data.items</h1></h2></h3><br> }</h1></h2></h3><br> if (item !== 'undefined') {</h1></h2></h3><br> cart = Object.assign(cart, item)</h1></h2></h3><br> }</h1></h2></h3><br> if (klAjax) {</h1></h2></h3><br> <i>learnq.push(['track', 'Added to Cart', cart]);</h1></h2></h3><br> klAjax = false;</h1></h2></h3><br> }</h1></h2></h3><br> }))</h1></h2></h3><br>};</h1></h2></h3><br>(function (ns, fetch) {</h1></h2></h3><br> ns.fetch = function() {</h1></h2></h3><br> const response = fetch.apply(this, arguments);</h1></h2></h3><br> response.then(res => {</h1></h2></h3><br> if (`${window.location.origin}/cart/add.js`</h1></h2></h3><br> .includes(res.url)) {</h1></h2></h3><br> addedToCart()</h1></h2></h3><br> }</h1></h2></h3><br> });</h1></h2></h3><br> return response</h1></h2></h3><br> }</h1></h2></h3><br>}(window, window.fetch));</h1></h2></h3><br>var klAjax = true;</h1></h2></h3><br>var atcButtons = document.querySelectorAll("form[action<i>='/cart/add'] button[type='submit']");</h1></h2></h3><br>for (var i = 0; i < atcButtons.length; i++) {</h1></h2></h3><br> atcButtons[i].addEventListener("click", function() {</h1></h2></h3><br> if (klAjax) {</h1></h2></h3><br> <i>learnq.push(['track', 'Added to Cart', item]);</h1></h2></h3><br> klAjax = false;</h1></h2></h3><br> }</h1></h2></h3><br> })</h1></h2></h3><br>}</h1></h2></h3><br>});</h1></h2></h3><br>
```
When you're done, test the event using the directions in the next section.
##
Test your "Added to Cart" event
It's important to note that Klaviyo only tracks "known browsers," or those who've been cookied (via clicking through an email, filling out a form, etc). For this reason, Added to Cart events may not start showing up in your account as quickly as you expect. To learn more about more about who Klaviyo tracks, head to our [article about onsite tracking](https://help.klaviyo.com/hc/en-us/articles/115005076767-Getting-started-with-Klaviyo-onsite-tracking#who-klaviyo-tracks5).
In order to test your Added to Cart event, you'll need to manually cookie your email address. Follow these steps:
1. Navigate to your website.
2. On your homepage, add the following to the end of the URL, replacing testing.email@gmail.com with your email address:\
?utm\email=testing.email@gmail.com\
\
3. Reload the page.
4. Navigate to a product page on your site and click your Add to Cart button.
5. Search in Klaviyo for your email address.\

You should see that a Klaviyo profile has been created for you (if one didn't exist already) and that this Added to Cart event has been tracked on your activity feed.
##
Having trouble tracking Added to Cart with the given snippet?
If you are having trouble tracking Added to Cart with the given snippet, you can try the 2 additional snippets below, which we'll refer to as Snippet 2 and Snippet 3. Before testing a new snippet, make sure to first remove the one that didn't work.
###
Determine which backup snippet to try
Does your store use a button ID to define the Add to Cart button? If the answer is yes, try Snippet 2. If your Add to Cart button is instead defined by class notation, you should use Snippet 3. Here's how to find out if your store uses a button ID or class notation:
1.
1. Open up one of your site’s product pages.
2. Right-click the "Add to Cart" button, and select Inspect.
3. The console will open, showing the source code of your "Add to Cart" button in the console’s Elements tab.
4. In the Elements tab, your code may look something like this:\
5. Notice that this "Add to Cart" button does not have a button ID (which would include something like `id = “buttonIDname`); instead, it is referenced by a class notation (`class= “btn product-formcart-submit btn–secondary-accent`).
###